Home / Drawing register / Sheet 03
Sheet 03 · Plaster
Lime or gypsum plaster on an old wall: which should you use?
A plasterer will often offer to hack off and skim in gypsum because it is quick. On an old solid wall that speed can come with a cost, and it may not be yours alone to decide.
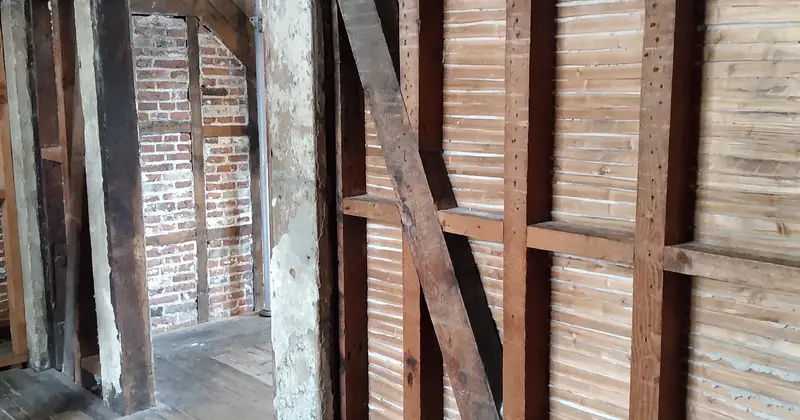

For a traditional solid wall of stone, brick, cob or timber frame, use lime unless there is a specific reason not to. Old walls tend to manage moisture by absorbing it and letting it evaporate, and a permeable lime finish works with that. SPAB says lime plaster should normally be used for repairs after damp work. Gypsum has its place on plasterboard and new partitions, and there are a few grey areas, which we come to below.
Before choosing a product, though, ask a prior question: does the old plaster need to come off at all?
Keep what you can
SPAB's guidance on listed buildings says plaster that is not failing should be retained, and should not be removed merely because it looks old or to expose stone or timber never meant to be seen. It describes doing nothing as the most economical option as well as the kindest to the building, and the same logic holds on an unlisted house.
Hollow does not always mean finished. An article in The Building Conservation Directory by a conservation practitioner notes that old plaster can sound hollow when tapped and still be sound if it contains hair. Small cracks and blown patches can often be repaired locally. On a listed house, stripping historic plaster may well count as an alteration that affects character and needs listed building consent, because listing covers the interior as well as the exterior.
Why lime rather than gypsum
The argument comes down to moisture. Lime plaster sets slowly by absorbing carbon dioxide from the air, and it stays relatively soft and open. Modern gypsum sets far more quickly. The Directory article goes as far as saying there is compelling evidence that modern gypsum plasters encourage condensation and mould on walls meant to breathe. That is one experienced author's view, written in 2006, but it matches the direction of SPAB's advice.
Three situations need more thought:
- Walls with past damp. Solve the cause first, using our guide to reading damp symptoms. SPAB says salt-resistant plasters favoured by many damp-proofing installers tend only to disguise continuing problems temporarily, and may need consent on a listed building.
- Patching fine old work. A setting coat can be gauged with a little plaster of Paris to achieve a flush repair on fine historic surfaces. The author treats this as a careful exception that balances looks against compatibility.
- Modern partitions and plasterboard. Nothing here argues against gypsum on a new stud wall. Be careful where one meets old fabric.
How the work goes on
From the second half of the 17th century most lime plastering went on in three coats, which gave a flat surface. Older buildings often have fewer coats and an undulating finish, and it is worth matching what is there rather than straightening everything. The schedule below follows the Directory article. Mixes are typical figures, and a good plasterer will adjust them to the sand.
| Coat | Typical mix (lime : sand) | Thickness | Notes |
|---|---|---|---|
| Scratch | 1 : 2.5, coarse sharp sand | Up to 15mm | Hair is a benefit on masonry and essential on laths. Scored in a diamond pattern while wet. |
| Floating | 1 : 3, usually without hair | Up to 15mm | Levelled with long rules, rubbed up as it stiffens, keyed with a devil float. |
| Setting (finish) | From 3 : 1 to 1 : 3, often 1 : 1, fine sand | 2 to 5mm | Built up in two or three very thin layers, then scoured and finished by trowel or float. |
Hydraulic limes set faster, but the same article says they are less flexible and breathable and should generally be avoided indoors. For internal plastering, fat lime has been the usual choice. Read the supplier's safety sheet before mixing any lime and protect your eyes and skin.
Why you cannot rush it
Most failed lime jobs come back to drying. Plan on two points:
Suction. A dry wall will pull water out of fresh plaster, and it will shrink and may fail. The wall is wetted beforehand, on the day or the day before depending on how porous it is, so that it is still damp to the touch after an hour but no longer glistening.
Curing. The scratch coat needs about two weeks and sometimes up to four. The floating coat then takes about a week or so before the finish. Shrinkage cracks in the scratch coat are normal. Covering exposed areas with hessian or polythene helps near open windows, and the article says dehumidifiers should be avoided. In a house renovation with heating, trades and a moving-in date, that is the part people find hardest. Build it into the programme from the start, particularly if the roof or windows are being done at the same time.
Finishing
A permeable plaster sealed under a vinyl paint loses much of the point. SPAB names limewash and soft distemper as the finishes that keep walls breathable where they can be used. Its listed-building guidance also warns against cement-based or impermeable and gloss paints on traditional buildings. For the outside of the same wall, its note on lime and cement renders explains why hard cement traps water and why removal should begin with a trial patch.
Sources
Opened and read by the editors in November 2026. Rules and guidance change, so check the current version.